Tech pack example · Style HC-S07
Hoodie Tech Pack Example and Template for a Graphic Pullover
See how to spec a graphic pullover for sampling and get a blank Excel workbook to brief your own style.
- Flat chest target
- 62.0 cm
- Artwork box
- 30.0 × 17.0 cm
- Minimum pocket clearance
- 4.0 cm
Use the blank workbook for your own style, measurements, artwork, and quote notes.
In this guide
- Download the Hoodie Tech Pack Template and See a Filled HC-S07 Example
- Draw the Hoodie Construction the Factory Needs to Quote
- Build the Fabric, Trim, and Artwork Specifications
- Specify Hoodie Measurements, Tolerances, and Grading
- Send One Revision for Sampling and Comparable Quotes
- Frequently Asked Questions
- Brief Your HC-S07 Graphic Hoodie
Download the Hoodie Tech Pack Template and See a Filled HC-S07 Example
The HC-S07 Style Card and Editable Excel
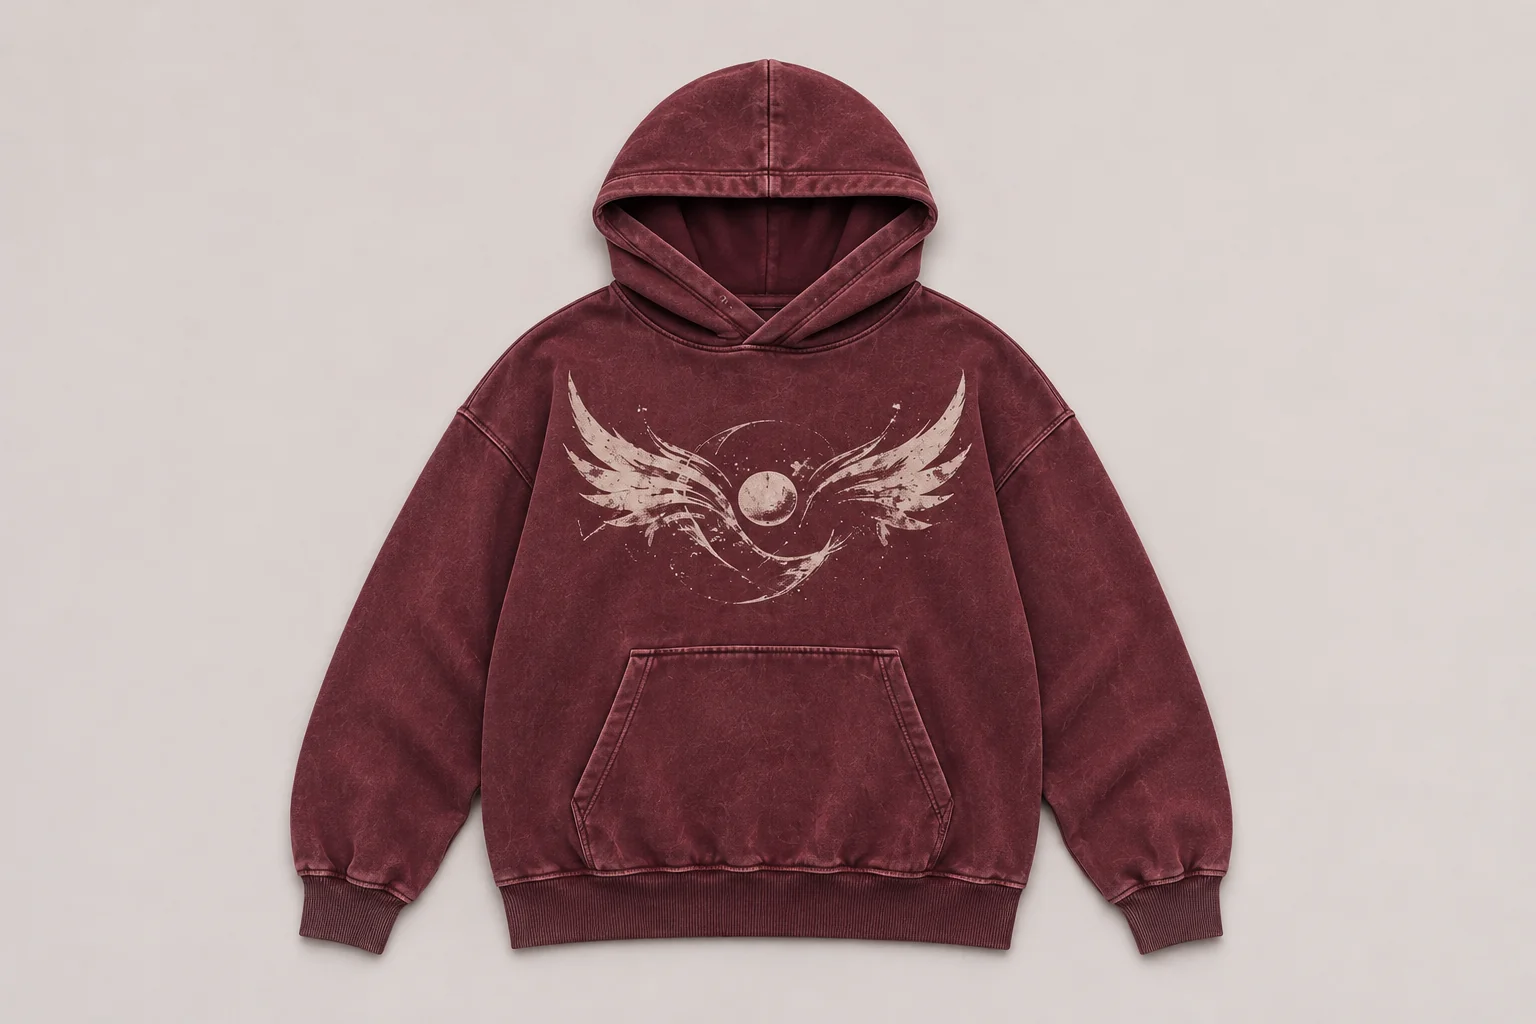
A hoodie tech pack is the set of drawings, materials, measurements, decoration instructions, and revision notes a factory uses to quote and sample a hoodie. Start with the example above, then download the blank workbook and enter your own style ID, base size, and artwork revision. The illustrated HC-S07 is a relaxed oxblood pullover with dropped shoulders, a kangaroo pocket, and a distressed ivory graphic. The numbers in its example show how to write a specification. Confirm your own dimensions with a fit reference before issuing the pack.
Organize the file so a supplier can identify the current revision without opening every attachment. On the style card, include the base size, unit of measure, garment type, colorway reference, and the purpose of the request. Note whether you need an initial price, a development sample, or a quote update on a revised build. The general clothing tech pack guide covers document ownership and how the complete file supports quoting. The worksheet here focuses on decisions specific to a graphic pullover.
Buyer Targets, Supplier Proposals, and Sample Measurements
Give each number or reference a clear status. A buyer target is the result you want. A supplier proposal is a suggested specification or substitute for your review. A sample measurement is an observation tied to a particular garment and date. For example, a 62.0 cm flat chest target belongs in the target column. If a supplier proposes a different width, record the reason in the proposal column and keep the measured result with the actual sample ID. Carry the accepted change into the next revision.
Give the pack a short file name that starts with your style ID and revision. Use those identifiers on the art file, on the drawing sheet, and in the supplier’s sample comments. In the introduction, list the two or three decisions you need the factory to make first. A buyer may send an appearance target for the garment, ask the supplier to propose the body and rib pairing, and hold the decoration method until a print trial is reviewed.
Four editable sheets for style and materials, measurements, artwork, and revisions and quote notes.
Draw the Hoodie Construction the Factory Needs to Quote
Front and Back Flats, Hood Panels, and Dropped Shoulders
Use front and back technical flats to show the seams, overlaps, and attachments the factory needs to price. On the front, mark the shoulder seam position, hood-to-neck join, pocket outline, cuff height, and hem rib. Add a back view for the hood profile, back neckline, and shoulder shape. A flat drawing is also a place to identify construction you want the supplier to propose. Label the lining, seam finish, or hood panel layout as open if the reference image cannot establish it.
HC-S07 shows the intended front appearance, including the hood overlap and relaxed shoulder line. For the next sample, decide how much overlap you want at center front and where the hood should sit when worn down. Record whether a single or double layer is proposed and identify the material used inside the hood. A change in hood weight or lining can affect the way it hangs, so ask for a worn side view and a flat back view at the same review.
Kangaroo Pocket Placement, Openings, and Rib Attachments
Mark the finished pocket width and height, the opening on each side, and the vertical position of the top seam. Reference the top seam from an agreed point such as the center-front neck seam. Specify where you want reinforcement and have the supplier show its proposed construction if that detail is open. Check hand entry while the hoodie is worn and compare left and right openings on the same flat sample. A centered pocket can still feel awkward if the openings or their angles differ.
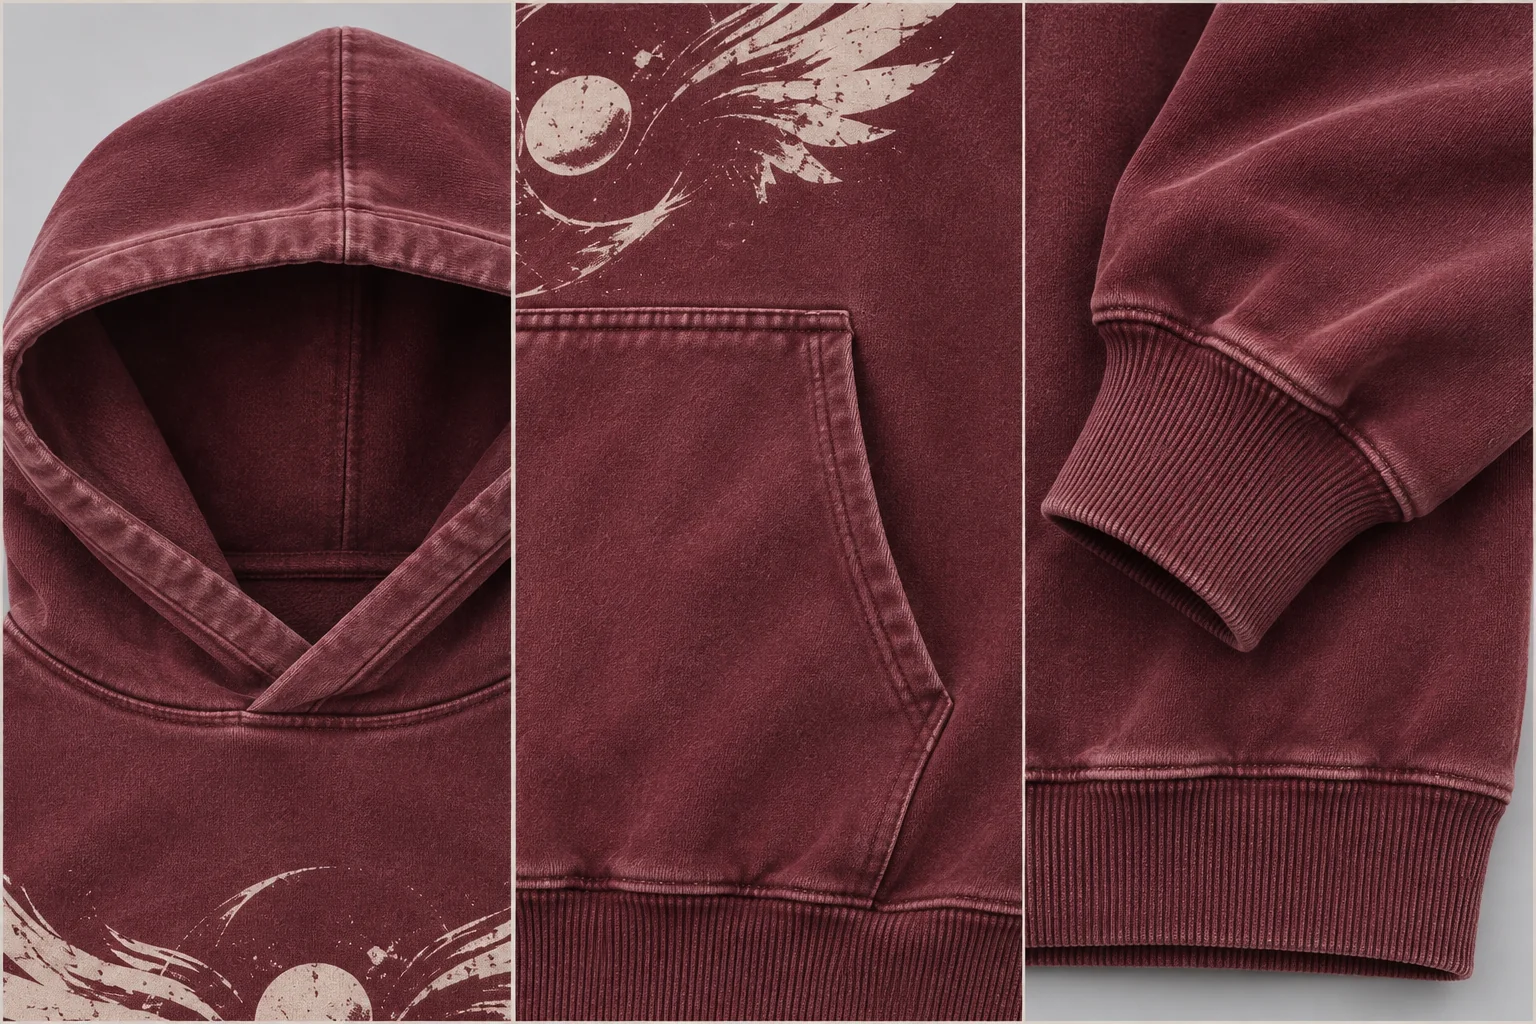
Record finished cuff and hem rib heights separately. Include the intended stretch and recovery of each part in the fit notes and specify whether the rib should match the body shade or read as a deliberate contrast. Ask for a close-up of the seam joining the cuff to the sleeve and the rib to the body. Review seam appearance and how the opening feels after the garment has received its proposed finish.
Build the Fabric, Trim, and Artwork Specifications
Body Fabric, Hood Lining, Rib, and the Bill of Materials
Create one bill of materials, or BOM, row for each component the factory must identify, price, or match. List the body fabric, hood lining, cuff and hem rib, sewing thread, labels, and decoration. Give each row a location, material reference, color reference, and status. For the body fabric, include the proposed composition, construction, weight, and stage at which the weight is assessed. For the rib, identify the shade and stretch direction and ask for a compatible swatch if its specification is still open.
If two suppliers propose different base fabrics, request swatch IDs and mark them as alternatives on separate rows. A common weight target helps the teams compare offers, while composition, knit structure, and finishing still need to be visible in the quote. Use the fabric GSM guide to document the weight field. CLO-SET’s tech pack documentation is an example of keeping material records and points of measure in separate sections of a pack.
Use the materials sheet to make substitutions visible. If the supplier wants to use a different fabric inside the hood, ask it to name the proposed material, specify the shade and care implications, and say which physical swatch represents it. Put the accepted swatch ID next to the row for that component. A swatch for the body and a separate one for the hood lining give the sample reviewer two clear references even when the colors are meant to match.
Chest Artwork Dimensions, Reference Points, and Pocket Clearance
Identify the artwork by filename or revision and state whether dimensions include the faint outer edges. On the front flat, show the garment center line and mark the top of the graphic from a fixed point on the sewn garment. Give the garment position and the artwork width and height their own fields. For the HC-S07 example, a 30.0 by 17.0 cm artwork box and 4.0 cm minimum clearance above the pocket illustrate how to record two independent requirements.
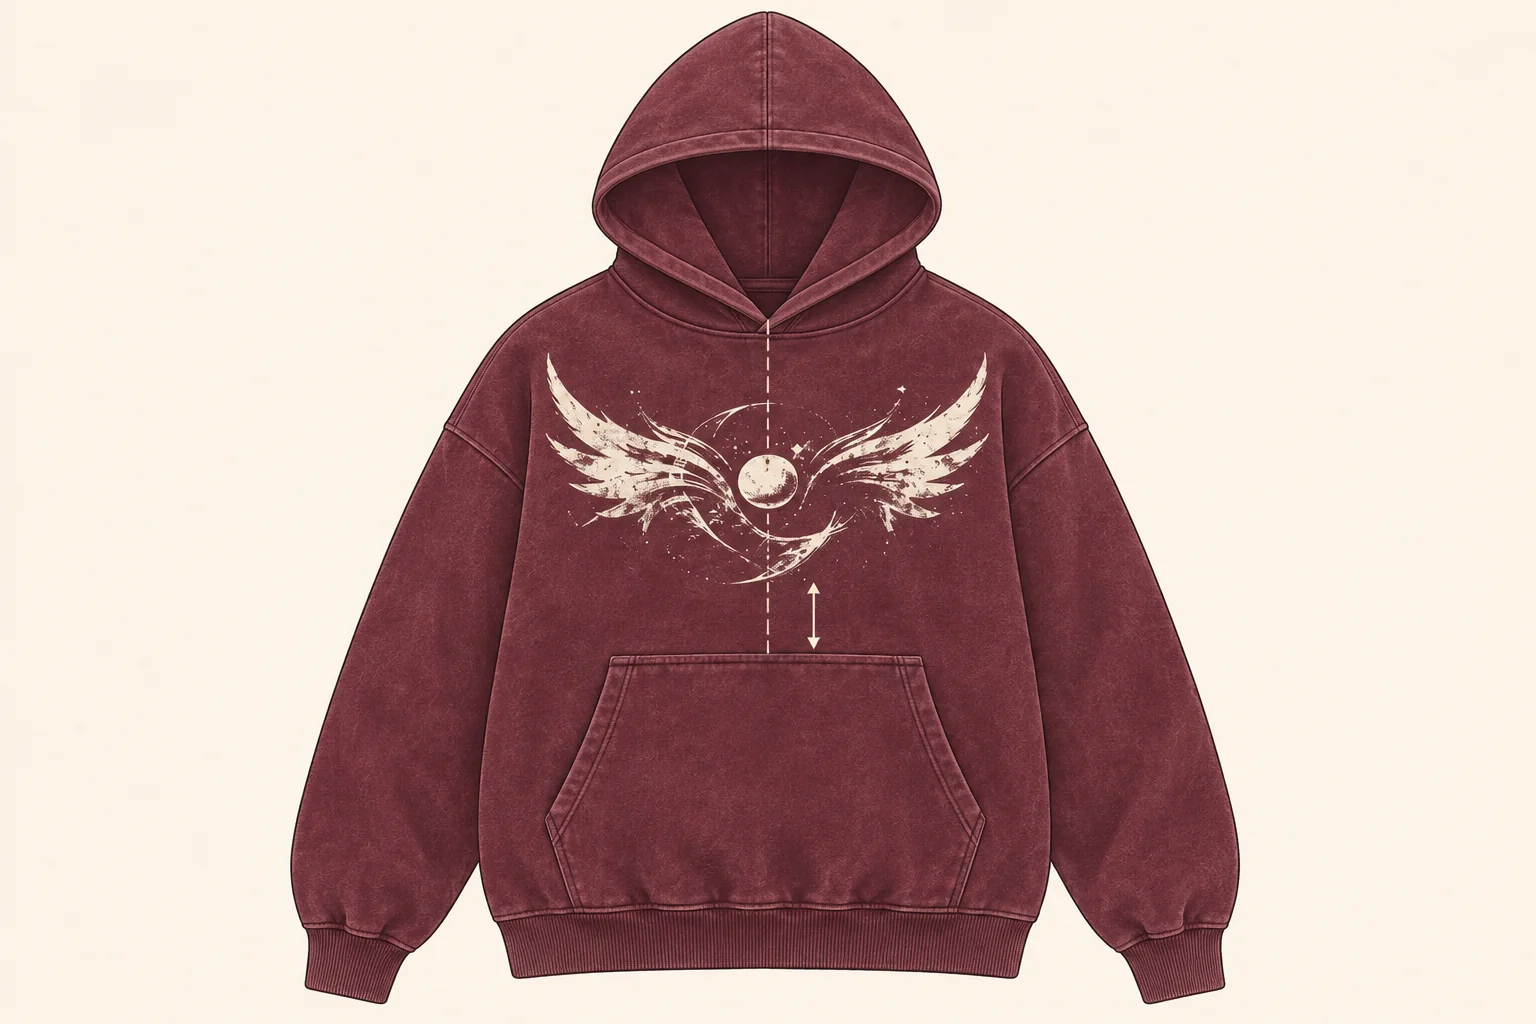
Specify whether the same artwork size applies to all sizes or whether the factory should propose a second print size. Ask to see the smallest size if pocket clearance is tight. Send the source artwork alongside an annotated position drawing, and approve a printed reference on the proposed garment or fabric. Use the printing and embroidery guide for method selection and the workbook to keep the artwork file, placement, and sample decision together.
The Oxblood Shade Reference and Intended Washed Appearance
Name the physical shade reference, indicate where visible fading is acceptable, and ask the supplier to identify its proposed finish. For HC-S07, describe how much seam contrast you want around the pocket and shoulders and how dark the chest should read behind the ivory graphic. If contrast changes under different lighting, agree on the review conditions and keep the accepted swatch or garment available. List the source and revision of the photograph when you use it to point out a zone.
Ask how the body and rib will be matched after the proposed process. Record any areas where the sample should receive a second look, such as a lighter patch behind the artwork or an abrupt color change at a join. The garment finishing and wash approval page covers how to communicate that visual boundary. Keep the proposed treatment and the final appearance decision on separate lines in the pack.
Specify Hoodie Measurements, Tolerances, and Grading
Base-Size Points of Measure and How to Take Them
A point of measure, or POM, combines an ID, a diagram location, and a method. Define how the garment lies, whether the material is relaxed, and the exact start and end points. For a flat chest width, specify the distance below the armhole and measure straight across once. For body length, indicate whether the hem rib is included and where the measurement begins. Assign each point a separate target and tolerance so reviewers can compare the same measurement without interpreting a flat differently.
Swipe or scroll to compare the measurement fields.
| Point | Method to record | Example entry |
|---|---|---|
| P01 · Flat chest width | Lay relaxed. Measure straight across at the agreed distance below the armhole. | Base-size target 62.0 cm |
| P02 · Sleeve length | Define whether the start is center-back neck or dropped shoulder seam. State whether the cuff is included. | Method and target to confirm |
| P03 · Hood depth | Show the measurement at the chosen level on a side flat. Keep the hood relaxed. | Supplier to propose |
| P04 · Pocket clearance | Measure vertically from the lowest graphic edge to the top pocket seam. | Example minimum 4.0 cm |
Hood, Sleeve, and Pocket Measurements Across Sizes
A dropped shoulder shifts the seam from which a sleeve can be measured. Agree on the sleeve method before adjusting sleeve length on the pattern. Review hood depth and opening, cuff opening, pocket access, and the relation between pocket and print in selected sizes. Identify which dimensions grade and which stay fixed, then have the pattern team confirm the proposed rules. A consistent size table lets a buyer see when a short sample sleeve comes from a changed shoulder line or a changed sleeve length.
Record the grade as finished garment targets for each size once the pattern team has proposed them. Pick the sizes you want to review and note why. The smallest size can help check artwork and pocket spacing, and a larger size can help check sleeve volume and the reach into the pocket. Keep the finished hood dimensions in the same table if they change by size. For a dimension that stays fixed, enter the same target in each relevant size column.
Garment Measurements Before and After Agreed Care
Record the state of the garment when it is measured. The finished sample, measured after the production finish, can also serve as the before-care baseline for a separate laundering check. After the agreed care, repeat the same points on the same sample with the same technique. Record the result and the project limit separately. Where relevant, AATCC TM150 provides a method for assessing garment length and width changes after home laundering. Agree with your supplier or lab on whether it applies to the project.
Send One Revision for Sampling and Comparable Quotes
What to Lock Before the Quote
Send the same revision, quantity split, colorways, artwork, and measurement methods to each factory. Identify the parts of the pack that control the quote, such as the body and rib specifications, the print size, the proposed finish, and whether the pattern already exists. List decisions that may change the price next to their owner and due date. Ask the supplier to quote the same scope for the sample and bulk assumptions so you can see where one offer includes work the other leaves open.
Ask for a short response against the pack before the sample is started. For example, one supplier may include the first artwork strike-off in the sample line and another may price it separately. Ask which physical reference will be reviewed and whether a change to the print size or finish would require a new submission. Log the answer next to the quote reference so that the next reviewer can see the difference in scope.
What the Factory Can Propose, With Alternatives Priced Separately
If you welcome a different rib construction, a second fabric, or a modified pocket reinforcement, record it as an alternate with its own reference. Ask how the proposal changes the appearance, sewing steps, or sample review. Request a separate quote line for each material or construction alternate and record any conditions. Keep the base quote against the same agreed revision. When you accept an alternate, update the materials and drawings together and circulate a fresh copy to everyone quoting the build.
Sample Comments, Approval References, and the Revision Log
Use a revision entry to state what changed, where it changed, and which sample or image prompted the decision. A useful note identifies the sample, the drawing or measurement ID, the proposed correction, the decision owner, and the next step. For example, if the chest graphic sits too close to the pocket, record the observed clearance on that sample and identify whether to move the artwork or change the pocket position. Keep the approved revision with the quote. The hoodie sample-to-bulk guide covers the later approvals after development.
Frequently Asked Questions
Can I Quote a Hoodie Before the Full Size Run Is Graded?
You can ask for a preliminary quote with the base-size specification, planned size range, quantity split, and grading questions listed. Ask the supplier to identify what it assumed for fabric consumption and print size. Revisit the quote if the final grade, size split, or decoration layout changes those assumptions.
Where Should I Measure Chest Artwork Placement?
Use a fixed garment landmark shown on the flat, such as the center-front neck seam. State whether the measurement ends at the top of the full artwork box or a marked printed edge. Record pocket clearance separately so the sample reviewer can check both position and spacing.
Does a Hoodie Tech Pack Need a Separate Rib Specification?
Give the cuff and hem rib their own rows. Record their finished heights and identify the swatch or proposal that governs shade, stretch, and recovery. If both use the same rib, give them the same material reference and list their different finished dimensions in the measurement sheet.
Which Files Should Travel With the Excel Workbook?
Include a PDF of the technical flats, the source artwork or a versioned preview, and photos of any physical references you plan to send. Use the same style and revision ID on each item. Note which files are ready for quoting and which will be supplied after the initial discussion.
Brief Your HC-S07 Graphic Hoodie
Choose HC-S07 in the Hoodie Gallery and Prepare the RFQ
Open the hoodie gallery and choose HC-S07 to brief the oxblood graphic pullover. Include your style reference, tech pack revision, intended size and color split, fabric proposal, and the decisions you want the first sample to settle. Paste the key fields into the project description and keep the workbook, flats, and artwork ready for follow-up. For another build, use the hoodie project inquiry and describe the reference you want quoted.
Choose HC-S07, then select “Prepare an RFQ for this style.”