Style HC-S20
How to Approve Oversized Screen Printing on T-Shirts
Check how much of each tee can take the print, then compare one artwork size with two size groups. Use the HC-S20 example to brief suppliers and review samples.
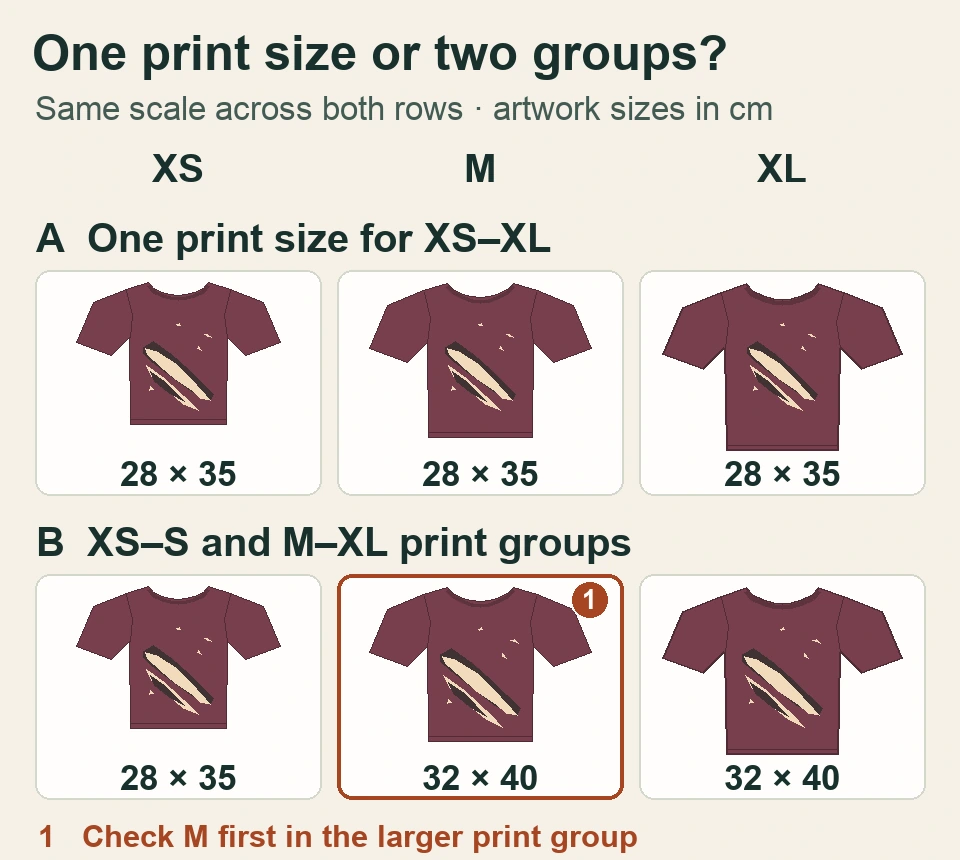
For HC-S20, A uses a 28 × 35 cm graphic across all sizes. B keeps it on XS–S and uses 32 × 40 cm on M–XL. Check the bigger print on M before approving the group.
In this guide
What Is Oversized Screen Printing?
Oversized screen printing uses an artwork area beyond a printer’s standard setup for that garment. A supplier may call the option jumbo screen printing and offer a separate usable width and height. Ask the supplier to confirm the area it can reliably print on your T-shirt, in the proposed position and on each relevant size. A large frame may give the printer more room for an image, while the press, platen and shape of the sewn front still determine how the garment can be loaded and printed. Screen Print Direct equipment guide
A large print contained within one front panel and a print that crosses a seam are different requests for a quote. For a contained print, show the edges the graphic needs to clear. For a seam-crossing print, mark where the artwork should continue and ask the supplier to propose how to handle the seam or when to print the cut panel. Treat that sequence as part of the sample brief. If the print method is still open, start with the apparel print methods guide to shortlist techniques before comparing quotes.
| Print route | Ask the supplier to confirm | First item to check |
|---|---|---|
| Standard front | Usable area on the sewn front for the requested placement. | Graphic outline and clearance on the smallest size. |
| Oversized or jumbo front | Printable envelope, garment loading and size-group setup. | Coverage, armhole and hem clearance, and appearance on larger sizes. |
| Seam-crossing or panel proposal | Process sequence, alignment reference and agreed tolerances. | Continuity at the specified seam on a sewn sample. |
Before asking for samples, decide which part of the artwork has to survive a size change. For HC-S20, the broad diagonal is the design cue, and the smaller marks give it texture. Point out which marks should stay in the printed file and which can move if a seam needs more room. The printer can then account for an intentional edit when measuring the printable envelope. The sample reviewer also has a clear reference for spotting a mark that disappeared during printing.
HC-S20 Worked Example and Blank Quote Worksheet
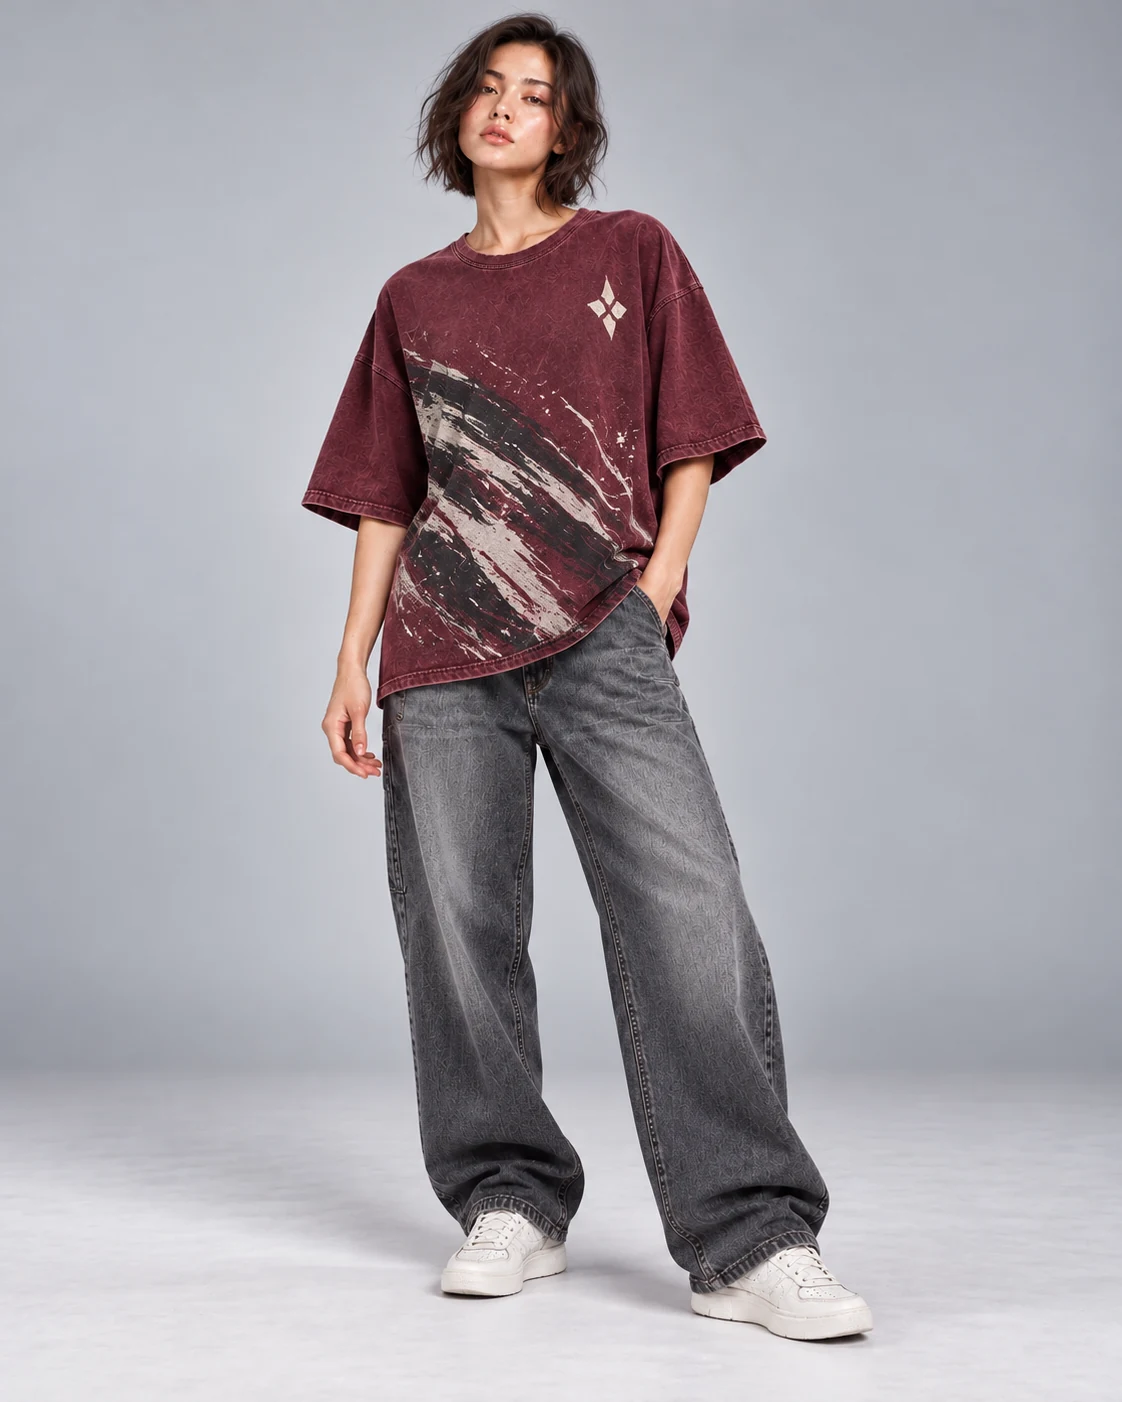
HC-S20 shows a washed burgundy box tee with a diagonal brush graphic. Assume the buyer’s range runs from XS to XL and the artwork has one main diagonal that should stay recognizable when worn. In this example, both proposals start from the same artwork file and keep its proportions. The numbers are illustrative dimensions for this decision. Confirm what the supplier can actually print on the sample garment.
| Entry | Illustrative HC-S20 record |
|---|---|
| Option A | One 28 × 35 cm graphic, measured width by height, for XS–XL. The XS sample clears the buyer’s marked seams and hem. The graphic occupies less of the XL front. |
| Option B | 28 × 35 cm on XS–S and 32 × 40 cm on M–XL. The buyer prefers the larger design on XL. M is the first size in the larger group and needs a sewn clearance check. |
| Quote and decision | Ask both suppliers to quote A and B with the same garment and quantity split. Keep A as the fallback. Hold B for bulk until the M clearance and the second setup charge are reviewed. |
Use Print specs by size to enter the artwork dimensions, garment references and clearances. In Supplier quotes, give each supplier a separate column for each proposal and record its setup charges and repeat-order terms. In A-B checks and sign-off, tie the matching pre-wash and post-care inspections to the sample and the decision for each size group. The downloadable file leaves the working cells blank.
Download the blank oversized screen printing Excel template
Map the Usable Print Area Across the Size Run
Specify Artwork Width, Height and Placement Landmarks
Start with the outermost visible points of the complete graphic, including any fine splashes or isolated marks that are meant to print. Draw the smallest rectangle containing those points and label its width and height in the agreed units. Next, mark a stable origin on the finished garment, such as the intersection of center front and an agreed level below the neckline seam. Measure the graphic’s placement from that origin. Attach the same artwork version to the technical flat and quote request.
The outside rectangle is a useful check for setup, and the actual diagonal outline shows where the artwork gets close to an edge. Mark the shortest gaps to the neckline seam, front armhole, side seam and finished hem where the design approaches them. The nearest point may change with garment size. If the diagonal is supposed to point toward a side seam, write down whether the buyer wants a small clean gap or a deliberate crossing. Give the sample room the marked flat so it can identify the same points on the sewn tee.
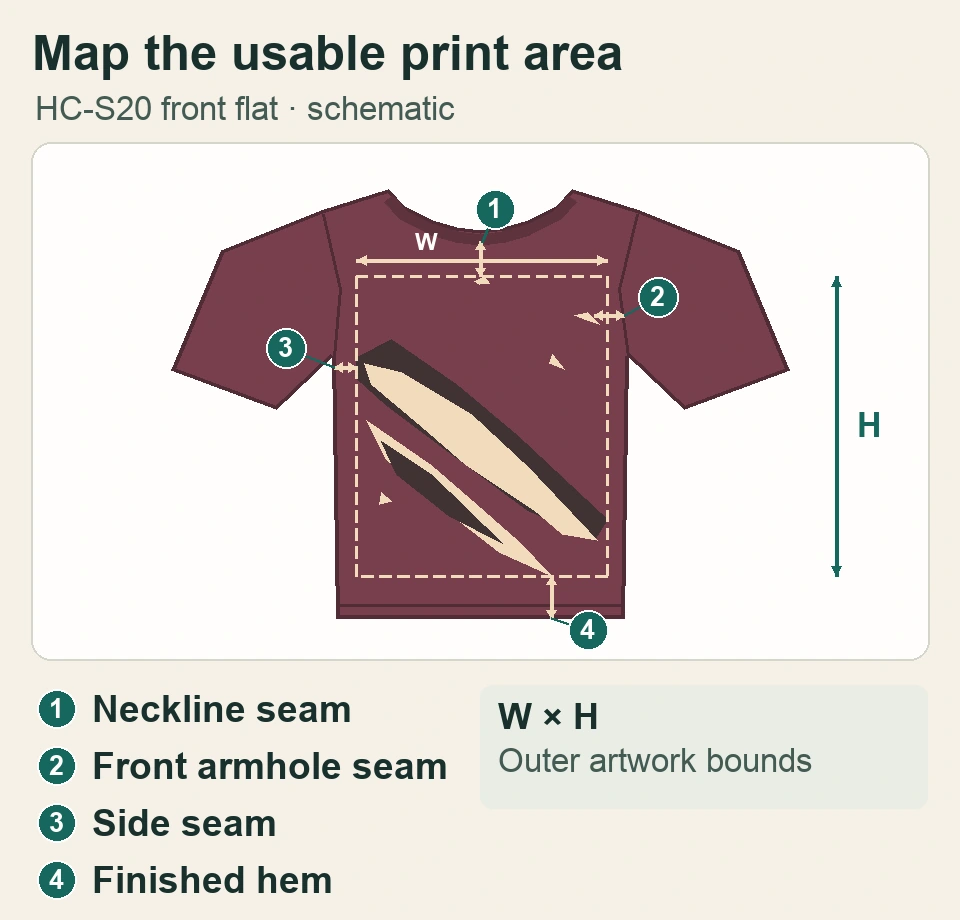
The T-shirt tech pack example shows where to store the drawing, artwork reference and component details. Use a larger cropped view of the closest gap when a full garment drawing makes the marks hard to read. Agree which edge or stitch line counts as the reference. This helps buyers and suppliers compare readings even when the hem and seam finishes are different thicknesses.
Give the anchor and the bounding rectangle separate labels. For instance, a supplier can position a design from center front while the diagonal extends further toward one side. If it centers the rectangle by eye, the artwork can shift relative to the position the buyer approved. Ask the supplier to identify the anchor it used on the print overlay and mark the measured offset on the sewn sample. For a garment with a shaped hem, use the actual closest point along that edge as well as the vertical position of the graphic.
Check the Smallest, Base and Largest Sizes
Start with the smallest size in each proposed print group. In the HC-S20 example, that means checking XS for both plans and M for B’s larger graphic. Check the base size and largest size for visual coverage and any change in the shape of the usable front. For wide or cropped tees, the print may approach a different edge as chest width and garment length grade. Ask for the garment measurements with the artwork overlay. If body proportions change at the same time, track that as a separate decision using the boxy versus oversized fit guide.
Use the full-scale flat to shortlist feasible sizes, then ask the supplier to load the sewn garment using the proposed platen and print position. If the garment can lie flat but the artwork approaches a raised construction detail, have the supplier identify the likely issue and propose the next sample. If it wants to print a panel before assembly, ask how it will control placement relative to the cut edge and what the buyer should expect after sewing. For approval, inspect the finished tee at the marked locations.
Build the overlay with the same garment revision used for quoting. If a washed example and an unfinished sample have different dimensions, note which state each drawing represents and ask the supplier to use the state that goes onto the print press for feasibility. Repeat the clearance checks on the finished garment for sign-off. Where the printed front will be sewn afterward, show the finished seam line and the cut edge on the panel drawing. This gives the printer and the sewing team the same placement reference.
Get Comparable Quotes for One or Two Print Sizes
Send each supplier the same artwork revision, body fabric reference, finish, ink color requirements and quantity by garment size. Ask it to quote both routes separately and name the fabric condition and press setup assumed. A quote that covers the smallest size may leave the upper part of the size range undefined. Get the supplier to write the artwork dimensions and size assignment next to each quoted option.
The number of physical screens and setups depends on the proposed artwork separations, print scale and the printer’s process. Ask the supplier to itemize which parts of the setup change when a second scale is added. One specialist guide uses different screen layouts as an example of how artwork proportions can be preserved across a size run. Treat its example as one supplier approach and ask your own printer to show the setup it proposes. Specialist guide to oversized setup
| Quote line | A · One print size | B · Two size groups |
|---|---|---|
| Art and usable print area | Confirm the shared artwork size and the limit on XS. | Confirm the two print sizes and the limits on XS and M. |
| Screens and sampling | List screens, setup charges and the samples included for the shared scale. | List screens and setup by scale. Identify which extra sizes need sampling. |
| Bulk and repeat orders | State the unit price basis, included services and screen reuse policy. | State the unit price by group, and the reuse or reset charge for each setup. |
Ask for the currency, quote validity and whether sampling is included or charged separately. Compare the same product and quantity basis and mark any excluded work. If the supplier offers a smaller graphic to solve a clearance problem, ask it to list the artwork revision and price that proposal as a separate option. That keeps the two original quotes comparable and gives the buyer a clear basis for accepting the change.
Separate what you pay once from what varies per garment. For example, an offer can include artwork preparation in one line, charge separately for screens and quote a different per-piece rate for each size group. Ask for the quantities behind those rates so two offers can be compared on the same order. Record when a sample fee is credited to bulk, whether the first run includes new screens, and what happens on a repeat. Use the setup records to explain the price difference alongside the samples.
Compare Sewn Samples Before and After Agreed Care
Keep the body pattern, fabric lot, wash finish, artwork source, placement anchor and print method consistent where practical. Record any required difference in ink or setup and tie it to the sample ID. Photograph A and B together under the same conditions and compare flat and worn views. Check the diagonal’s balance, clearance at the marked seams and hem, and whether the smallest splashes are present as intended. If one edge disappears into a fold when worn, mark the garment and compare it to the target photo on the same fit reference.
Agree on the wash, dry and rest conditions before the trial and record the actual cycle for each sample. Use the same measurement landmarks afterward. Review the garment width and length, the graphic position, edge definition, coverage and any changes noticed on the surface. Keep a separate field for the visual decision and the measured change. If the print still looks balanced but moved closer to the hem, report that gap and apply the buyer’s agreed limit. The vendor can then see which part of the specification to revisit.
When formal dimensional-change evidence is required, ask the lab to confirm a suitable method for the garment. AATCC TM150 covers garment length and width changes after home laundering and may be unsuitable for certain stretch fabrics. Keep lab results tied to their sample IDs and record the appearance review separately. AATCC TM150 scope
A buyer can use the same test card on each representative size. Note where the two designs differ before care, and repeat the checks after the samples have rested for the agreed time. If a measured gap is close to the agreed limit, record the number and tag the point in a photo instead of relying on a general note such as “looks fine.” Have the sample room confirm the placement tolerance it can hold, then decide whether to revise the print or request another paired trial.
Approve the Print and Send the Supplier Brief
Record the approved physical sample, body pattern revision and graphics for each size group. Save the supplier’s print zone and setup references beside the quote and note open checks with an owner and expected evidence. A buyer can release an artwork layout for further sampling while leaving bulk approval on hold. Require updated evidence for affected sizes when the garment construction, placement anchor, print scale or ink system changes. Link the record to your garment quality control checklist so inspection can find the same guide marks.
If the buyer chooses B, the handoff should identify exactly which sizes receive the larger artwork and which file the printer should use for each group. If the supplier changes the size split after a fit update, ask for a new overlay and a sample at the new group boundary. Retain the earlier specification and decision so they can be traced if the order is repeated. The product development and sampling page covers what to include when you request a new sample or revision.
Open the T-shirt development gallery, select HC-S20 and choose “Prepare an RFQ for this style.” The style-specific inquiry brief carries the style code. Share the intended artwork size, size split and whether the supplier should quote the single layout, the grouped layout or both.
Frequently Asked Questions
What Is the Maximum Oversized Screen Print Size?
Ask for the usable width and height on the actual garment and placement. The supplier needs the body size, artwork dimensions and nearby seams or hem to confirm a print zone. Check the smallest garment in each print group, particularly when a large rectangle fits the equipment but part of the graphic approaches a seam.
Can One Screen Setup Cover Every T-Shirt Size?
Ask whether one artwork scale gives the intended coverage across the range and fits the smallest garment. Review a large size on the same placement anchor to see how the proportions change. If you add a second scale, ask the supplier how it affects screens, setup costs and samples for the new size group.
What Should I Ask If the Artwork Crosses a Seam?
Show exactly where the print should cross and what alignment is acceptable on the sewn garment. Ask the supplier which assembly stage it would print at and how it would check the join. Review a physical sample at the intended size, then record the approved finish and any visible changes after the agreed care check.
Which Setup Costs Can Apply to a Repeat Order?
Ask whether the supplier retains screens or digital setup references for the approved artwork and for how long. Confirm charges for resetting the line, rebuilding screens, changing a color or adding another artwork scale. Link the terms to the approved print size and revision so the reorder quote uses the same assumptions.